관련된 글 : [안드로이드] layout <include> 속성 정의 및 이벤트 구현하기
1. CustomView 에 대한 글을 왜 작성하게 되었을까?
1-1. View 의 재사용이 필요하다.
CustomView 를 사용하는 이유는 View 의 재사용을 위해서다. 디자인이나 React 같은 프레임워크에서는 이런 개념을 컴포넌트라고 부른다. 디자인과 UX 의 통일성을 유지하기 위해 동일한 형태의 UI 를 여러 군데에서 사용하게 되는데 이런 UI 를 사용하는 곳마다 각각 구현하기에는 코드의 길이도 길어지고, 수정 및 관리하기에도 어렵다.
1-2. CustomView 와 include 를 비교하자면?
완전히 동일하고 글자만 바꿔주면 되는 경우에는 include 로 쉽게 해결할 수 있다. 여기서 조금 복잡해지는 정도도 include 되는 layout 에 variable 을 선언하여 어느정도 해결할 수 있다. 이 글의 맨 위에서 소개한 글에서도 그 방법을 제공한다. 하지만 로그인 되었을 때, 로그인하지 않았을 때 비슷하지만 다른 UI 를 제공해야 한다면 include 만으로는 해결하기 어렵다.
1-3. React 나 Flutter 와 비슷한 방식을 이용하고싶다.
React 나 Flutter 를 이용해 개발해본 경험이 있다면 알겠지만, 이 프레임워크들은 컴포넌트화게 매우 쉽다. 이 프레임워크들에서는 재사용하고싶은 부분의 코드만 떼어내면 끝이다. 별도의 작업을 필요로하지 않는다. 안드로이드는 xml 을 이용하여 UI 를 개발하기 때문에 컴포넌트화가 어렵다. 다만, 안드로이드도 객체지향적으로 UI 를 작성할 수 있는데, 과거에는 Anko 라이브러리가 있었고 지금은 Jetpack Compose 가 있다. 마크업이 아닌 코드 기반의 UI 작성 경험이 있는 곳이라면 Jetpack Compose 를 이용해 UI 를 작성하는 것도 충분히 고려해볼 만하다고 생각한다.
1-4. 한글로 작성된 CustomView 글을 찾아보기 어렵다.
CustomView 에 대해 설명한 한글 자료는 꽤 있지만 이 글과 같은 방법을 설명하는 자료는 많지 않다. 있더라도 Java 코드로 작성된 과거의 글이 많다. 아마 CustomView 에 대해 검색한다면 아마 onDraw 를 override 하는 방법을 사용하는 자료가 많을 것이다. onDraw 를 이용하면 모든 뷰들의 좌표값을 직접 계산해야 하고, 안드로이드에서 사용하는 길이의 단위가 pixel 이 아니라 dp 인 점을 고려하면 더더욱 어려워진다.
나는 반드시 좌표를 계산해야 하는 UI 가 아니라, 단순히 사용했던 UI 를 재사용하는 방법에 대해 설명할 것이다.
2. LayoutInflater
2-1. LayoutInflater.inflate()
LayoutInflater 를 이용할 것이다. LayoutInflater 는 무엇일까? LayoutInflater 의 메서드인 inflate 의 뜻을 검색해 보면 "부풀게 하다" 라는 결과가 나온다. 이 말이 이해가 되는가? 나는 이해하지 못 했다. 그래서 내가 이해한 것을 바탕으로 설명하겠다. inflate 함수는 layout xml 파일을 바탕으로 View 를 화면에 그려주고, View 객체를 반환하는 함수이다. ViewBinding 을 이용할 경우 Binding 객체를 반환한다.
2-2. LayoutInflater 를 얻는 방법
다음은 가장 많이 사용하는 방법과 두 번째로 많이 사용하는 방법이다.
val layoutInflater = LayoutInflater.from(context)val inflater: LayoutInflater = context.getSystemService(Context.LAYOUT_INFLATER_SERVICE) as LayoutInflatercontext 를 통해 LayoutInflater 를 얻을 수 있다.
2-3. inflate 하는 방법
layoutInflater.inflate(R.layout.view_custom, root, false)첫 번째 인자로 layout 을 정의한 xml 참조값을 받는다.
두 번째 인자로 이 View 의 부모격인 ViewGroup 을 받는다.
세 번째 인자로 두 번째 인자로 받은 ViewGroup 에 이 View 를 연결시켜줄 것인지에 대한 Boolean 값을 받는다. 두 번째 인자가 null 이라면 세 번째 인자는 넘겨주지 않아도 된다.
val layoutInflater = LayoutInflater.from(context)
val binding = ViewCustomBinding.inflate(layoutInflater, this, false)
ViewBinding 을 이용한다면 위와같이 작성할 수 있다.
class CustomView(context: Context, attrs: AttributeSet) : ConstraintLayout(context, attrs) {
    init {
        inflate(context, R.layout.view_custom, this)
    }
}
View 를 상속받는 곳이라면 inflate 를 그냥 사용할 수 있다. ( View.inflate() 이다. )
public static View inflate(Context context, @LayoutRes int resource, ViewGroup root) {
    LayoutInflater factory = LayoutInflater.from(context);
    return factory.inflate(resource, root);
}
구현을 살펴보면 내부적으로 LayoutInflater 를 생성하여 사용한다.
여기까지 사전 지식 설명이 끝났다. 이제 본격적으로 CustomView 구현에 들어가 보자.
3. CustomView 구현하기
3-1. UI

우리가 만들 View 는 위와 같은 모습이다.
3-2. 속성 정의
<?xml version="1.0" encoding="utf-8"?>
<resources>
    <declare-styleable name="CustomView">
        <attr name="showBackButton" format="boolean" />
        <attr name="title" format="string"/>
    </declare-styleable>
</resources>
res/values/attrs.xml 에 이 코드를 작성한다. 이 코드는 나중에 layout xml 에서 사용할 때 속성값으로 값을 전달할 수 있다.
3-3. layout 작성
<?xml version="1.0" encoding="utf-8"?>
<layout xmlns:app="http://schemas.android.com/apk/res-auto"
    xmlns:tools="http://schemas.android.com/tools">
    <androidx.constraintlayout.widget.ConstraintLayout
        xmlns:android="http://schemas.android.com/apk/res/android"
        android:layout_width="match_parent"
        android:layout_height="52dp">

        <ImageButton
            android:id="@+id/back_button"
            android:layout_width="24dp"
            android:layout_height="24dp"
            android:layout_marginStart="16dp"
            android:background="@null"
            android:src="@drawable/ic_arrow_back"
            app:layout_constraintBottom_toBottomOf="parent"
            app:layout_constraintStart_toStartOf="parent"
            app:layout_constraintTop_toTopOf="parent" />

        <TextView
            android:id="@+id/title"
            android:layout_width="match_parent"
            android:layout_height="match_parent"
            android:layout_marginHorizontal="16dp"
            android:gravity="center"
            android:textSize="18sp"
            android:textStyle="bold"
            app:layout_constraintTop_toTopOf="parent"
            tools:text="제목" />
    </androidx.constraintlayout.widget.ConstraintLayout>
</layout>
layout 은 빼도 된다. activity_main 에서 다음과 같이 사용한다.
<?xml version="1.0" encoding="utf-8"?>
<androidx.constraintlayout.widget.ConstraintLayout
    xmlns:android="http://schemas.android.com/apk/res/android"
    xmlns:app="http://schemas.android.com/apk/res-auto"
    xmlns:tools="http://schemas.android.com/tools"
    android:layout_width="match_parent"
    android:layout_height="match_parent"
    tools:context=".MainActivity">

    <org.algosketch.androidpractice.CustomView
        android:id="@+id/my_custom_view"
        android:layout_width="match_parent"
        android:layout_height="52dp"
        android:background="@color/white"
        android:elevation="4dp"
        app:layout_constraintTop_toTopOf="parent"
        app:showBackButton="true"
        app:title="algosketch" />

    <TextView
        android:id="@+id/hello"
        android:layout_width="wrap_content"
        android:layout_height="wrap_content"
        android:text="Hello World!"
        app:layout_constraintBottom_toBottomOf="parent"
        app:layout_constraintLeft_toLeftOf="parent"
        app:layout_constraintRight_toRightOf="parent"
        app:layout_constraintTop_toTopOf="parent"/>

</androidx.constraintlayout.widget.ConstraintLayout>
// MainActivity.kt
class MainActivity : AppCompatActivity() {
...
fun onClickBack(view: View) {
finish()
}
}
3-3. 렌더링하기
class CustomView(context: Context, attrs: AttributeSet) : ConstraintLayout(context, attrs) {
init {
inflate(context, R.layout.view_custom, this)
}
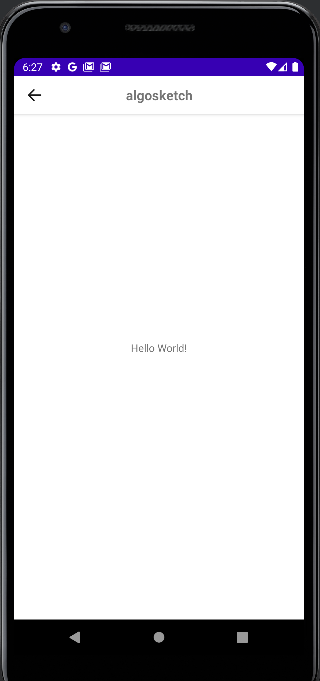
}간단히 위 코드만 작성하고 실행하면 아래와 같은 화면이 나온다.

속성값으로 전달해준 내용을 적용하는 코드가 없기 때문이다.
3-4. 속성 값 대입 및 backButton 에 대한 setBackClickListener 제공
class CustomView(context: Context, attrs: AttributeSet) : ConstraintLayout(context, attrs) {
    private var showBackButton: Boolean = true
    private lateinit var title: String

    init {
        initAttrs(attrs)
        initView()
    }

    private fun initAttrs(attrs: AttributeSet) {
        context.theme.obtainStyledAttributes(
            attrs,
            R.styleable.CustomView,
            0, 0
        ).apply {
            // 속성으로 전달받은 값을 대입하는 부분
            try {
                showBackButton = getBoolean(R.styleable.CustomView_showBackButton, true)
                title = getString(R.styleable.CustomView_title) ?: ""
            } finally {
                recycle()
            }
        }
    }

    private fun initView() {
        inflate(context, R.layout.view_custom, this)

        val titleTextView = findViewById<TextView>(R.id.title)
        val backButton = findViewById<ImageButton>(R.id.back_button)

        titleTextView.text = title
        if(!showBackButton) backButton.visibility = View.GONE
    }

    /**
     * View.setOnClickListener 에서 제공하는 것과 비슷한 역할
     */
    fun setOnBackListener(listener: OnBackListener) {
        val backButton = findViewById<ImageButton>(R.id.back_button)
        backButton.setOnClickListener {
            listener.onClick(it)
        }
    }

    /**
     * Kotlin 에서 작성한 코드는 SAM 을 람다로 받을 수 없기 때문에
     * onClick 메서드를 람다로 받을 수 있도록 오버로딩 했다.
     */
    fun setOnBackListener(action: (view: View) -> Unit) {
        val backButton = findViewById<ImageButton>(R.id.back_button)
        backButton.setOnClickListener {
            action(it)
        }
    }

    interface OnBackListener {
        fun onClick(view: View)
    }
}
onClick 메서드를 위해 약간의 난리를 쳐 놨기 때문에 이번 코드는 조금 길다. 속성값을 얻어오는 부분은 공식 문서를 참고했다. obtainStyledAttributes() 가 반환하는 건 TypeArray 객체로 아래와 같이 사용할 수도 있다.
val typeArray = context.theme.obtainStyledAttributes(attrs, R.styleable.CustomView, 0, 0)
title = typeArray.getString(R.styleable.CustomView_title) ?: ""
TypeArray 는 공유 리소스라 사용 후 재활용해야 한다고 해서 정확히 어떤 동작이 일어나는지 궁금했는데,,,
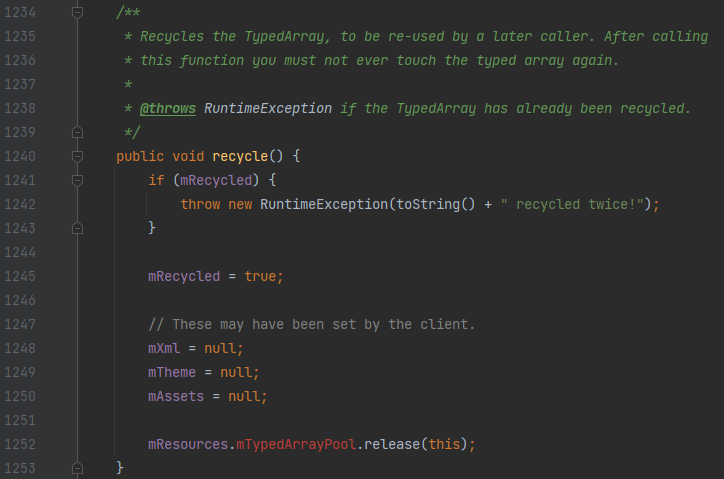

컨트롤 클릭으로 해당 파일로 이동할 수 없었다고 한다. 혹시 아시는 분 댓글 달아주세용... 나머지 코드는 주석으로 간단하게 설명했고, 특별히 어려운 코드는 없기에 자세한 설명은 생략한다.
// MainActivity.kt
val myCustomView = findViewById<CustomView>(R.id.my_custom_view)
myCustomView.setOnBackListener {
    println("우와아아앙")
    finish()
}
onClick 메서드는 위와 같이 대입하면 된다.
class MainActivity : AppCompatActivity() {
    override fun onCreate(savedInstanceState: Bundle?) {
        ...

        val myCustomView = findViewById<CustomView>(R.id.my_custom_view)
        myCustomView.setOnBackListener (OnBackListener())
    }

    inner class OnBackListener : CustomView.OnBackListener {
        override fun onClick(view: View) {
            println("우와아아앙")
            finish()
        }
    }
}
물론 이렇게 써도 된다.

RecyclerView.Adapter 의 bind 함수를 구현하듯, 데이터 바인딩을 이용해 커스텀뷰를 더 간단히 만드는 방법도 시도해봤으나 아직 성공하지 못 했다. 만약 성공한다면 다음 글을 작성할 것이다. RecyclerView 도 바인딩이 가능하니 CustomView 도 가능할 것이다.
전체 소스코드는 GitHub 에서 확인할 수 있다.
참고자료
https://gun0912.tistory.com/38
[안드로이드/Android]CustomView를 만들어서 재사용하기
이전 포스팅에서 Style테마를 이용하여 일정한 레이아웃의 속성을 만들고 이를 재사용하는 방법에 대해서 알아 보았습니다. [안드로이드]style테마 활용으로 노가다코딩 줄이는 방법 이 방법보다
gun0912.tistory.com
https://medium.com/vingle-tech-blog/android-layoutinflater-b6e44c265408
안드로이드 LayoutInflater 사용법
LayoutInflater를 사용하는 방법과, 비동기적으로 LayoutInflater를 사용 하는 방법
medium.com
https://developer.android.com/training/custom-views/create-view?hl=ko
뷰 클래스 만들기 | Android 개발자 | Android Developers
잘 설계된 맞춤 뷰는 잘 설계된 다른 클래스와 매우 유사합니다. 즉, 사용하기 쉬운 인터페이스로 일련의 특정 기능을 캡슐화하고 CPU 및 메모리를 효율적으로 사용하는 등의 역할을 합니다. 그
developer.android.com
'안드로이드' 카테고리의 다른 글
| [Android] Compose를 이용한 애니메이션 (0) | 2023.08.19 |
|---|---|
| 안드로이드 노트 (0) | 2023.07.27 |
| [안드로이드] 반응형을 고려한 xml 마크업 (ConstraintLayout) (0) | 2022.02.26 |
| [안드로이드] layout <include> 속성 정의 및 이벤트 구현하기 (0) | 2022.02.10 |
| [안드로이드] 리사이클러뷰 데이터 바인딩 이벤트 (RecyclerView data binding) (0) | 2022.01.27 |


